


Table of Contents
- Why Accurate Waist Measurement Matters for Shapewear Fit
- Tools You'll Need for Measuring Your Waist
- Step-by-Step Guide to Measure Your Waist
- How to Use a Shapewear Size Chart to Find Your Size
- How to Choose the Right Shapewear Size Beyond Waist Measurement
- How to Stop Shapewear Rolling Down: Prevention Through Proper Sizing
- Common Measurement Mistakes and How to Avoid Them
- Measurement Variations by Body Type and Torso Length
- Frequently Asked Questions
Last Updated: September 20, 2026
Why Accurate Waist Measurement Matters for Shapewear Fit
Learning how to measure waist for shapewear is the foundation of shapewear that actually works. A measurement that's off by even half an inch can mean the difference between a garment that smooths your silhouette and one that digs into your sides or rolls down by lunchtime.
Most shapewear fit problems stem from not knowing how to measure waist for shapewear correctly. Knowing your true waist measurement lets you confidently choose a size that fits your body instead of guessing.
Proper measurement ensures shapewear stays in place, fits comfortably without digging, and creates a smooth contour. The natural waist is narrower than your hips and belly, exactly where shapewear needs to sit for support without slipping.
Tools You'll Need for Measuring Your Waist
Essential tools:
- A soft tape measure (the flexible kind used for sewing, not a rigid ruler)
- A mirror (so you can see proper tape placement)
- Comfortable, fitted clothing or undergarments (nothing baggy)
- A pen and paper to write down your measurement immediately
Use a soft fabric tape measure, not a rigid one, it conforms to your body's curves and costs just a few dollars.
Wear fitted clothing or underwear, baggy clothes create air gaps that throw off your measurement.
Write your measurement down immediately so you have it when shopping.
Step-by-Step Guide to Measure Your Waist
Finding Your Natural Waist
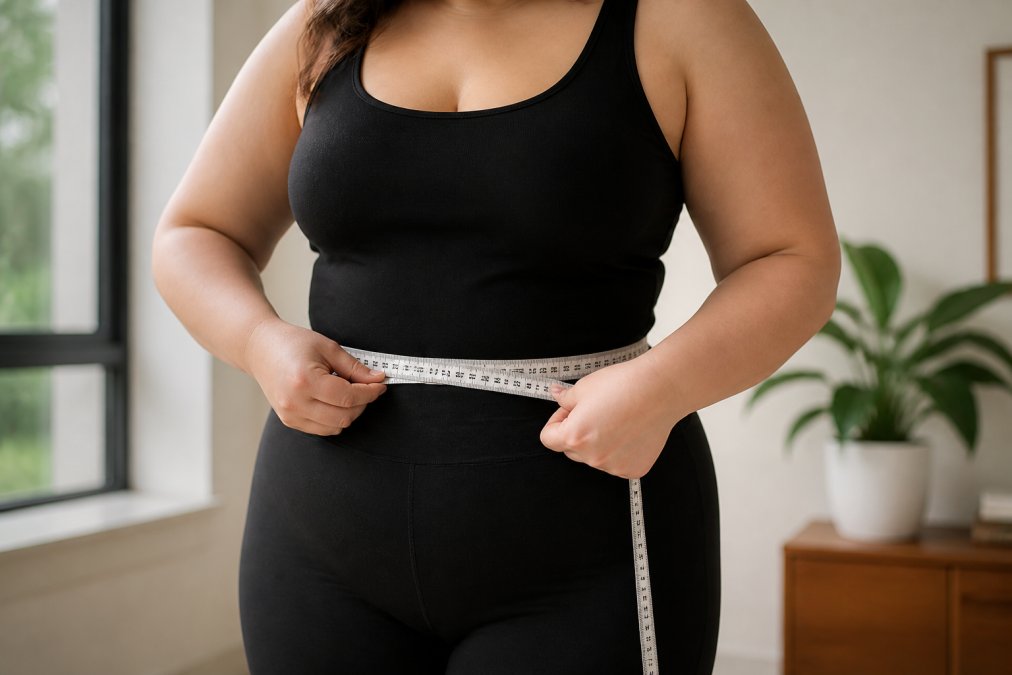
Your natural waist is the narrowest point of your torso, typically just above your belly button, not where your pants sit or at your rib cage. To find it, stand in front of a mirror and bend slightly to one side; you'll feel a crease or indentation. This is where shapewear compression works best, providing support across your midsection without cutting into your hips or ribs.
Proper Tape Placement and Tension
Position the tape horizontally around your natural waist, parallel to the ground. Tape tension is critical: it should sit snug against your skin with one finger fitting comfortably underneath. Too tight gives a false, smaller measurement; too loose is inaccurate. Stand in relaxed, natural posture without sucking in or puffing out your stomach, this is how your body actually is when wearing shapewear.
Recording Your Measurement
Read where the tape overlaps at the front of your waist and write down the number in inches, rounding up if between sizes. Take three measurements and average them to catch errors. Keep this number for consulting size charts.
How to Use a Shapewear Size Chart to Find Your Size
Most shapewear size charts pair waist measurement ranges with size labels (e.g., "28-30 inches = Size Small"). Find your waist measurement on the chart and note the corresponding size. If you're at the edge of a range, consider your body type and fit preferences.
Different styles fit differently, so always check the specific size chart for the style you're interested in.
How to Choose the Right Shapewear Size Beyond Waist Measurement
Waist measurement is the starting point, but torso length, hip circumference, and compression level also matter. A longer torso may need a different size to avoid riding up or bunching. If your hip measurement is significantly larger than your waist, size up to accommodate your hips. Medium compression is more forgiving if you're between sizes. Test fit against your actual outfits, as different fabrics and draping affect how visible sizing issues become.
The Power Bodysuit Shaper ($30.00) offers medium hold across torso and hips in three colors. For more coverage or firmer compression, The High-Waist Thigh Shaper ($55.00) extends to mid-thigh with a silicone no-roll band.

How to Stop Shapewear Rolling Down: Prevention Through Proper Sizing
Shapewear rolling down is usually a sizing problem. It happens when the waist is too loose, the garment is too short for your torso, or compression is too light. Accurate measurement and correct sizing eliminate these issues, keeping the garment at your natural waist with enough tension to stay put.
The High-Waist Thigh Shaper features a silicone no-roll band to keep it in place. Correct fit also means the garment sits at the narrowest point of your torso, which is naturally more stable.

Common Measurement Mistakes and How to Avoid Them
Mistake 1: Measuring over clothing. Measure directly against your skin or thin underwear only. Mistake 2: Tape too tight. Use the one-finger rule, you should fit one finger under the tape comfortably. Mistake 3: Holding your breath or sucking in. Measure in relaxed, natural posture with normal breathing. Mistake 4: Wrong location. Measure at your natural waist (the indentation when you bend to the side), not where pants sit or at your widest point. Mistake 5: Single measurement. Take three measurements and average them. Mistake 6: Not writing it down. Write your measurement immediately so you have it when shopping.
Measurement Variations by Body Type and Torso Length
Your waist measurement is the foundation, but your body type and proportions determine whether that measurement translates to the same size across all shapewear styles. Understanding your body type helps you measure correctly and interpret size charts with confidence.
Apple-Shaped Bodies: Midsection-Focused Measurement
Apple-shaped bodies carry weight in the midsection, with waist and hip measurements that are closer together than other body types.
How to measure accurately: When finding your natural waist, bend slightly to the side as instructed, but pay extra attention to the indentation. If your midsection is fuller, the crease may be subtle. Feel for the narrowest point between your rib cage and hip bones, this is your true natural waist, even if it's not dramatically narrower than your hips.
Size chart interpretation: Look for the waist measurement range on the chart, but also note the hip range for that same size. If your hips fall into a larger size range than your waist, you have two options: (1) size up to accommodate your hips and accept slightly looser compression at the waist, or (2) choose a style with a silicone no-roll band at the waist to prevent slipping if you size to your waist measurement.
Best style match: Firm-compression bodysuits or high-waist shapers work best because they provide support across the entire midsection. Avoid styles that only target the waist, you need coverage across your belly and lower abdomen.
Pear-Shaped Bodies: Hip-Focused Measurement
Pear-shaped bodies have narrower waists and significantly fuller hips and thighs.
How to measure accurately: Measure your waist at the narrowest point as usual, but also measure your hip circumference at the fullest point (typically 8-9 inches below your natural waist). Write both numbers down. When you consult a size chart, you'll need to find a size that accommodates your larger hip measurement, even if your waist would fit a smaller size.
Size chart interpretation: Find your hip measurement on the chart first. This determines your base size. Then check whether your waist measurement falls within the waist range for that size. If your waist is significantly smaller (more than 2 inches below the range), you may experience gapping at the waist. In this case, look for styles with adjustable waist panels or choose a style with a silicone no-roll band.
Best style match: High-waist thigh shapers or full-length bodysuits that extend to mid-thigh or below work best because they provide support from your natural waist through your hip and thigh area.
Hourglass Figures: Balanced Measurement
Hourglass figures have balanced waist-to-hip ratios. Your challenge is finding shapewear that fits both proportions without gapping or pulling.
Rectangle Body Types: Waist Definition Measurement
Rectangle body types have minimal waist definition, with waist and hip measurements that are very close.
Best style match:
Torso Length: The Often-Overlooked Measurement
Torso length affects shapewear fit as much as waist and hip measurements do, yet many people overlook it.
Putting It All Together: A Measurement Worksheet
When you measure, record:
- Natural waist circumference (at the narrowest point)
- Hip circumference (at the fullest point, typically 8-9 inches below natural waist)
- Torso length (from base of neck to hip bone)
- Body type (apple, pear, hourglass, rectangle, or your own description)
- Tape tension notes (did the tape feel snug, loose, or just right?)
When you consult a size chart, use all five data points. Your waist measurement is the starting point, but your hip measurement, torso length, and body type determine whether you need to adjust up, down, or choose a style with specific features (like silicone no-roll bands or adjustable panels) to ensure a perfect fit.
Frequently Asked Questions
Where exactly should I measure my waist for shapewear?
Measure your natural waist, which is the narrowest point of your midsection, typically located just above your belly button. Stand in a relaxed posture and place a soft tape measure horizontally around this area. Your natural waist is where your torso naturally curves inward, not at your hip bones or the widest part of your belly. This measurement is crucial because shapewear sizing depends on accurate waist measurements to ensure proper fit and prevent rolling down during the day.
Should I size up or down in shapewear based on my waist measurement?
Use your actual waist measurement with your shapewear size chart rather than sizing up or down. Sizing up may cause rolling and shifting, while sizing down creates uncomfortable compression and restricts movement. However, if your measurement falls between two sizes, consider your torso length and the level of compression you prefer. The High-Waist Thigh Shaper and other medium-hold options provide comfort.
Why is my shapewear rolling down even after measuring correctly?
Rolling typically occurs due to incorrect size selection, inadequate compression level, or poor band placement at the natural waist. Ensure your shapewear sits at your natural waist with a snug fit, not loose or overly tight. The High-Waist Thigh Shaper features a silicone no-roll band. If rolling persists, verify your measurement is accurate and that you've selected the right size from the shapewear size chart. Body proportions and torso length also affect how shapewear contours your silhouette.
Does shapewear size correspond to my regular clothing size?
No, shapewear sizing does not always match your clothing size. Shapewear is sized based on body measurements (waist, hips, bust) rather than standard dress sizes. Two women wearing the same clothing size may need different shapewear sizes depending on their body proportions and where they carry weight. Always measure your waist, hips, and bust, then refer to the specific shapewear size chart provided by the brand. This ensures proper fit and the smoothing effect you want without uncomfortable compression or gaps.