


Table of Contents
- What You'll Need Before You Start Measuring
- Step-by-Step: How to Measure for Plus Size Lingerie
- Plus Size Bra Fitting Guide: Turning Measurements into Cup Size
- How to Measure Waist for Shapewear That Stays Put
- How to Stop Shapewear Rolling Down: Fit and Adjustment Tips
- Body Shape Adjustments: Going Beyond Standard Sizing
- Fabric Elasticity and Stretch: Why It Affects Your Size Choice
- Frequently Asked Questions
Last Updated: September 11, 2026
What You'll Need Before You Start Measuring
Getting accurate numbers for how to measure for plus size lingerie starts with three tools and one rule: use a soft measuring tape, wear a non-padded bra, and stand in front of a mirror so the tape stays parallel to the floor. This guide from TLovePlusSize walks through every measurement you need, in order, with the adjustments standard size charts ignore.
Most fitting guides hand you a chart and call it a day. That approach fails anyone whose bust, waist, and hips don't land neatly in one column. The FDA's guide to wearing apparel labeling governs how U.S. garments are sized and labeled, but it doesn't tell you how to read those labels against your own body. That part is on you, and it's easier than it sounds.
Here's what to gather before you begin:
- A soft measuring tape (the flexible fabric kind, not a metal carpenter's tape)
- A non-padded bra or a fitted camisole, so the tape reads your actual bust rather than foam
- A full-length mirror
- A notebook or phone to record each number as you go
Step-by-Step: How to Measure for Plus Size Lingerie
Work through the measurements below in order and write each one down. Keep the tape snug without compressing it and level all the way around; round to the nearest half inch. Band and bust set your bra size, waist and hips set your shapewear and panty size, and torso length tells you whether a high-waist piece will sit where it's designed to.
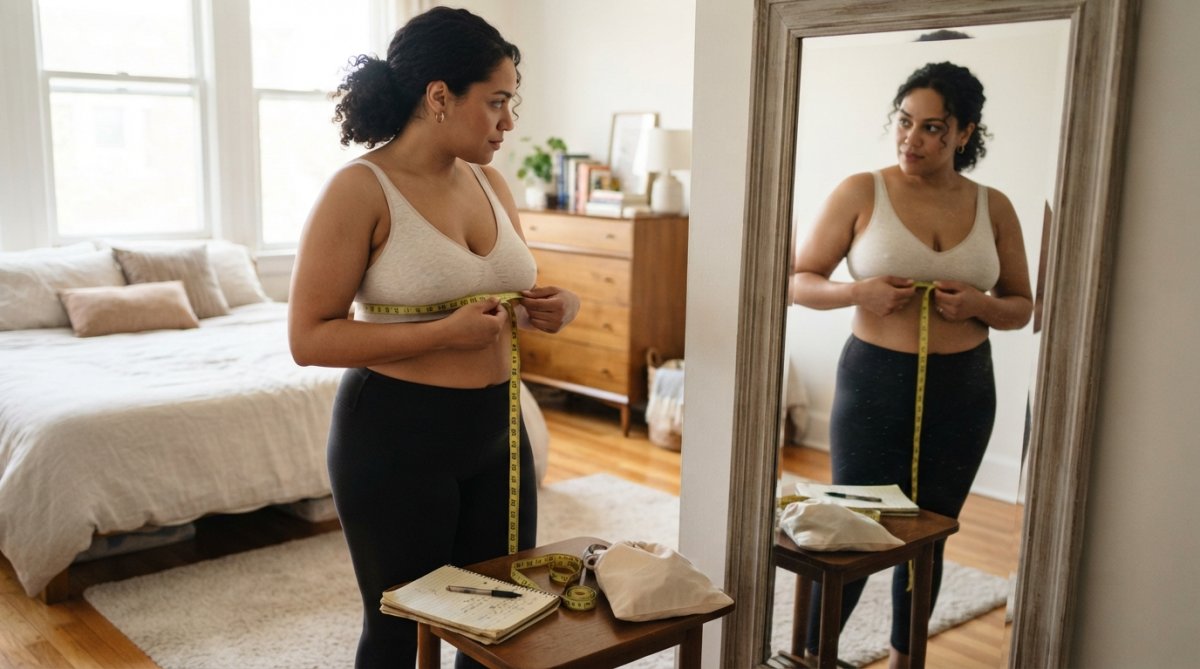
Measure Your Band Size
Wrap the tape around your rib cage, directly under your bust, parallel to the floor. Pull it snug, exhale normally, and read the number where the tape meets itself. This underbust measurement sets your band size: even numbers are typically your band size, odd numbers round up to the next even. A band that's too loose slides up your back by midday, the root cause of most "my bra won't stay put" complaints.
If your underbust is 40 inches or higher, a band matching your exact measurement often feels tight because larger bands carry more weight, start with your measured band and size up only if it digs in while the cups still fit (reddit.com). If your underbust changes by more than an inch between a relaxed exhale and a full inhale, note both numbers; the average is your working band size.
Measure Your Bust at the Fullest Point
Run the tape around the fullest part of your bust, usually across the nipple line, keeping it level and not pulling tight. A compressed reading gives you a cup that's too small, the most common sizing mistake in plus-size bra fitting.
If your breasts are asymmetrical, measure each side separately from underbust up over the fullest point to the underbust line on the other side. Record the larger number and fit the larger side; a cup that fits the smaller side will cut into the larger one. If you have a fuller lower bust, measure at the point of maximum projection rather than assuming the nipple line is fullest, the two can differ by an inch or more.
Measure Your Natural Waistline
Find your natural waistline by bending slightly to one side; the crease that forms is your waist. Wrap the tape around that point, typically the narrowest part of your torso, and keep it relaxed. Don't suck in. Your natural waist measurement drives shapewear sizing more than any other number, because it's where a waistband either anchors or rolls.
If your waist sits high (short-waisted) or low (long-waisted), measure at the crease itself and ignore where a size chart assumes your waist should be. Plus-size torsos often carry more length below the waist than above it, pushing the natural waist lower than the chart's midpoint. Measuring at the crease is the single biggest fix for shapewear that folds at the ribcage.
Measure Your Hip Circumference
Stand with your feet together and wrap the tape around the widest part of your hips and rear, usually 7 to 9 inches below your natural waist. Keep the tape parallel to the floor and note the number at the fullest point. Hip circumference determines whether a high-waist brief or thigh-smoothing short stays in place or rides up.
For pear-shaped proportions, the widest point may sit lower than 9 inches below the waist; walk the tape down in half-inch steps until the number stops increasing and use that as your hip measurement. For apple-shaped proportions, measure both your natural waist and your high hip (3 to 4 inches below the waist) and use the larger number for high-waist pieces, since the garment has to clear the widest point to reach the waist.
Measure Your Torso Length
This is the measurement most guides leave out, and it decides whether a high-waist piece stays put. Measure from the top of your shoulder, over the fullest part of your bust, down to your natural waist. A short torso often needs a mid-rise brief; a long torso usually needs a high-waist design with more length to anchor.
| Measurement | Where to Place the Tape | Key Tip |
|---|---|---|
| Band size | Under the bust, around the rib cage | Keep snug, exhale before reading; note inhale/exhale range if it varies more than an inch |
| Bust | Fullest part of the bust | Don't compress; measure each side separately if asymmetrical |
| Natural waist | The crease when you bend sideways | Stay relaxed, don't suck in; measure at the crease, not the chart's midpoint |
| Hips | Widest point of hips and rear | Feet together, tape level; walk the tape down if pear-shaped |
| Torso length | Shoulder, over bust, to natural waist | Decides high-waist vs. mid-rise shapewear |
Plus Size Bra Fitting Guide: Turning Measurements into Cup Size
Cup size comes from the difference between your bust and band measurements: subtract the band number from the bust number, and each inch of difference generally equals one cup letter, 1 inch near an A, 2 inches near a B, and so on. That formula is the backbone of every plus size bra fitting guide, but it's a starting point, not a verdict.
Cup volume changes with band size even when the letter stays the same: a 40DD and a 44DD don't hold the same amount, which is why a bra that "should" fit on paper can still cut into your sides (barenecessities.com). If you're between cup sizes, size up in the cup and down in the band only when the band runs loose. For fuller busts, a structured underwire and wide band do the real holding work, exactly what pieces like The Sheer Mesh Underwire are built around, carrying support up to an I cup.

How to Measure Waist for Shapewear That Stays Put
Shapewear sizing lives and dies by your natural waist measurement, plus one reading most guides skip: torso length. Measure from the top of your shoulder, over the fullest part of your bust, down to your natural waist. That distance tells you whether a high-waist piece will sit where it's designed to or fold at your ribcage.
When you know how to measure waist for shapewear, you can match the garment's rise to your torso instead of guessing. Measure your waist relaxed, then check the size chart against both that number and your hip circumference, since shapewear has to clear your hips to reach your waist.
How to Stop Shapewear Rolling Down: Fit and Adjustment Tips
Rolling waistbands often trace back to a band that's too large or a torso that's too short. If you want to know how to stop shapewear rolling down, recheck those two measurements.
- Size down if the waistband gapes when you sit; a snug fit grips, a loose one slides
- Choose a higher rise if your torso is long, so the band has more surface to hold
- Smooth the band flat against your skin when you put it on, with no folds trapped underneath
- Look for a hook and eye closure or silicone grip strip at the waist for extra hold
Body Shape Adjustments: Going Beyond Standard Sizing
Standard sizing assumes one body ratio, and plus size proportions rarely match it exactly. Read your measurements as a ratio, and adjust the size you buy based on which measurement is doing the work.
Apple Shape: Bust and Midsection Lead
If your midsection is the widest part of your torso and your bust is full, trust your high-hip and waist measurements over the chart's suggested shapewear size, and expect to size up in the cup. Measure your high hip (3 to 4 inches below the natural waist) alongside your natural waist, and use the larger number for high-waist briefs or bodysuits, since the garment has to clear the widest point before anchoring at the waist. For bras, a wider band (three or more hooks) distributes pressure across the back rather than digging into the sides.
Pear Shape: Hips and Rear Lead
If your hips run wider than your bust, size shapewear and panties to your hip circumference and accept a slightly roomier waist, or look for adjustable side panels. Measure your hip at its true widest point, which for pear proportions often sits lower than the standard 7 to 9 inches below the waist; walk the tape down in half-inch steps until the number stops increasing. For bras, a pear shape usually means a smaller band relative to the bust, so the band-to-cup ratio matters more than the cup letter. If you're between band sizes, size down in the band and up in the cup, since a smaller band on a narrower ribcage holds better.
Hourglass Shape: Waist Definition Leads
If your bust and hips are close in measurement and your waist is noticeably narrower, your natural waist is the anchor for everything. Size shapewear to your waist first, then check that the hip opening clears your hip measurement; a piece that fits the waist but pinches at the hip will roll. For bras, hourglass proportions often fit best in a band matching the underbust exactly, with cups sized to the bust difference, because the narrower ribcage gives the band more grip. If your waist-to-hip difference is 10 inches or more, look for shapewear with a defined waist panel rather than a straight tube, which will gap at the waist or bind at the hip.
Rectangle and Inverted Triangle Shapes
If your bust, waist, and hips are within a few inches of each other (rectangle), your measurements will often land in a single size column, and the main adjustment is fabric choice rather than size. If your bust is proportionally larger than your hips (inverted triangle), trust your bust and band measurements over the chart and expect to size up in the cup, then size shapewear to your hip measurement and accept a roomier waist or choose adjustable side panels.
Non-Standard Sizes and Asymmetry
For non-standard sizes, a visual fitting guide helps more than a number: stand in front of a mirror, hold the tape where the chart tells you to, and compare that line to where the garment's seam actually falls. If they don't match, adjust the size, not your expectations. If your bust is asymmetrical, fit the larger side and use a removable pad or slight strap adjustment on the smaller side rather than sizing down and cutting into the fuller side. If your torso length falls outside the typical range, prioritize adjustable straps, hook-and-eye closures, or convertible rises, which give an inch or more of forgiveness a fixed-seam piece won't.
Fabric Elasticity and Stretch: Why It Affects Your Size Choice
Fabric stretch decides whether your measurements translate into a comfortable fit or a constant tug-of-war. A firm, low-stretch fabric holds its shape and follows your measurements closely, while a high-stretch knit forgives a half-inch here and there but may lose support over a long day.
Mesh and lace, for instance, breathe and move but need a structured band and underwire to do the heavy lifting on a fuller bust, the thinking behind pieces like The Goddess Lace Set, where floral lace sits over a supportive frame rather than replacing it. For less projection under clothing, a firmer construction such as The Minimizer Bra reduces how the bust reads under a fitted top while still holding through larger cup sizes. When you're between sizes in a stretchy fabric, size down for hold; in a firm fabric, size to your exact measurement.


Finding lingerie and shapewear that fits your actual proportions, not a chart's idea of them, comes down to four honest measurements and a willingness to adjust for body shape and fabric stretch. At TLovePlusSize, our collection is built for exactly that: structured support up to an I cup, designs that move with your body, and everything from everyday essentials to lace-detailed date-night styles. Explore the range and find pieces that smooth, shape, and stay put through your whole day. Explore Now
Frequently Asked Questions
How do I calculate my bra size if I am a plus-size woman?
Start with a soft measuring tape. Measure your underbust snugly for band size, then measure the fullest part of your bust. Subtract band from bust: 1 inch = A, 2 = B, 3 = C, and so on. For plus sizes, add 0-2 inches to band if the underbust is over 40 inches. Always measure over a non-padded bra. TLovePlusSize bras like The Sheer Mesh Underwire go up to I cup, so accurate numbers matter.
How should lingerie fit on a plus-size body?
The band should be snug but not tight, sitting parallel to the floor. Cups should contain the entire breast without spillage or gaping. The center gore should lie flat against your sternum. Straps should be adjusted so you can fit two fingers underneath. For shapewear, the waistband should stay in place without rolling. If you're between sizes, size up for comfort, especially with lace or mesh styles.
Do I need a professional fitting for plus-size lingerie?
Not necessarily. With a soft measuring tape and our plus size bra fitting guide, you can get accurate measurements at home. However, if you're unsure or your size fluctuates, a professional fitting can help. Use our guide to measure waist for shapewear and bust for bras to stay confident.
How often should I re-measure for lingerie?
Re-measure every 6 to 12 months, or after any significant weight change, pregnancy, or hormonal shifts. Fabric elasticity also changes over time, so even if your body measurements stay the same, your bra's stretch may not. For postpartum bodies, measure monthly until your size stabilizes. Keeping a record of your measurements helps you spot changes and avoid size discrepancies when shopping.